Student Contact Manager User Guide
Hi there! Welcome to our user guide for Student Contact Manager, a student-designed application made for busy university students who are in need of managing their daily activities. It contains many features that help with the management of contacts and events, such as adding, deleting, editing, viewing, and finding of contacts, as well as adding, deleting, editing, viewing, and listing ongoing events. The application also helps with importing and exporting of contacts for better portability.
This user guide aims to aid you in your usage of our application, as well as to explore its various features that can help you manage your own daily activities. To navigate the application, you can use the table of contents placed below. There are also links posted throughout the application that lead back to the table of contents to ease navigability.
Quick start
Ensure you have Java
11or above installed in your computer.- To check whether you have the above installed, open the terminal on your device, and then run
java -version.
- To check whether you have the above installed, open the terminal on your device, and then run
Download the latest
scm.jarfrom here.Copy the file to the folder you want to use as the home folder for Student Contact Manager.
Open a command terminal, change the directory (
cd) into the folder you put the.jarfile in, and use thejava -jar scm.jarcommand to run the application.
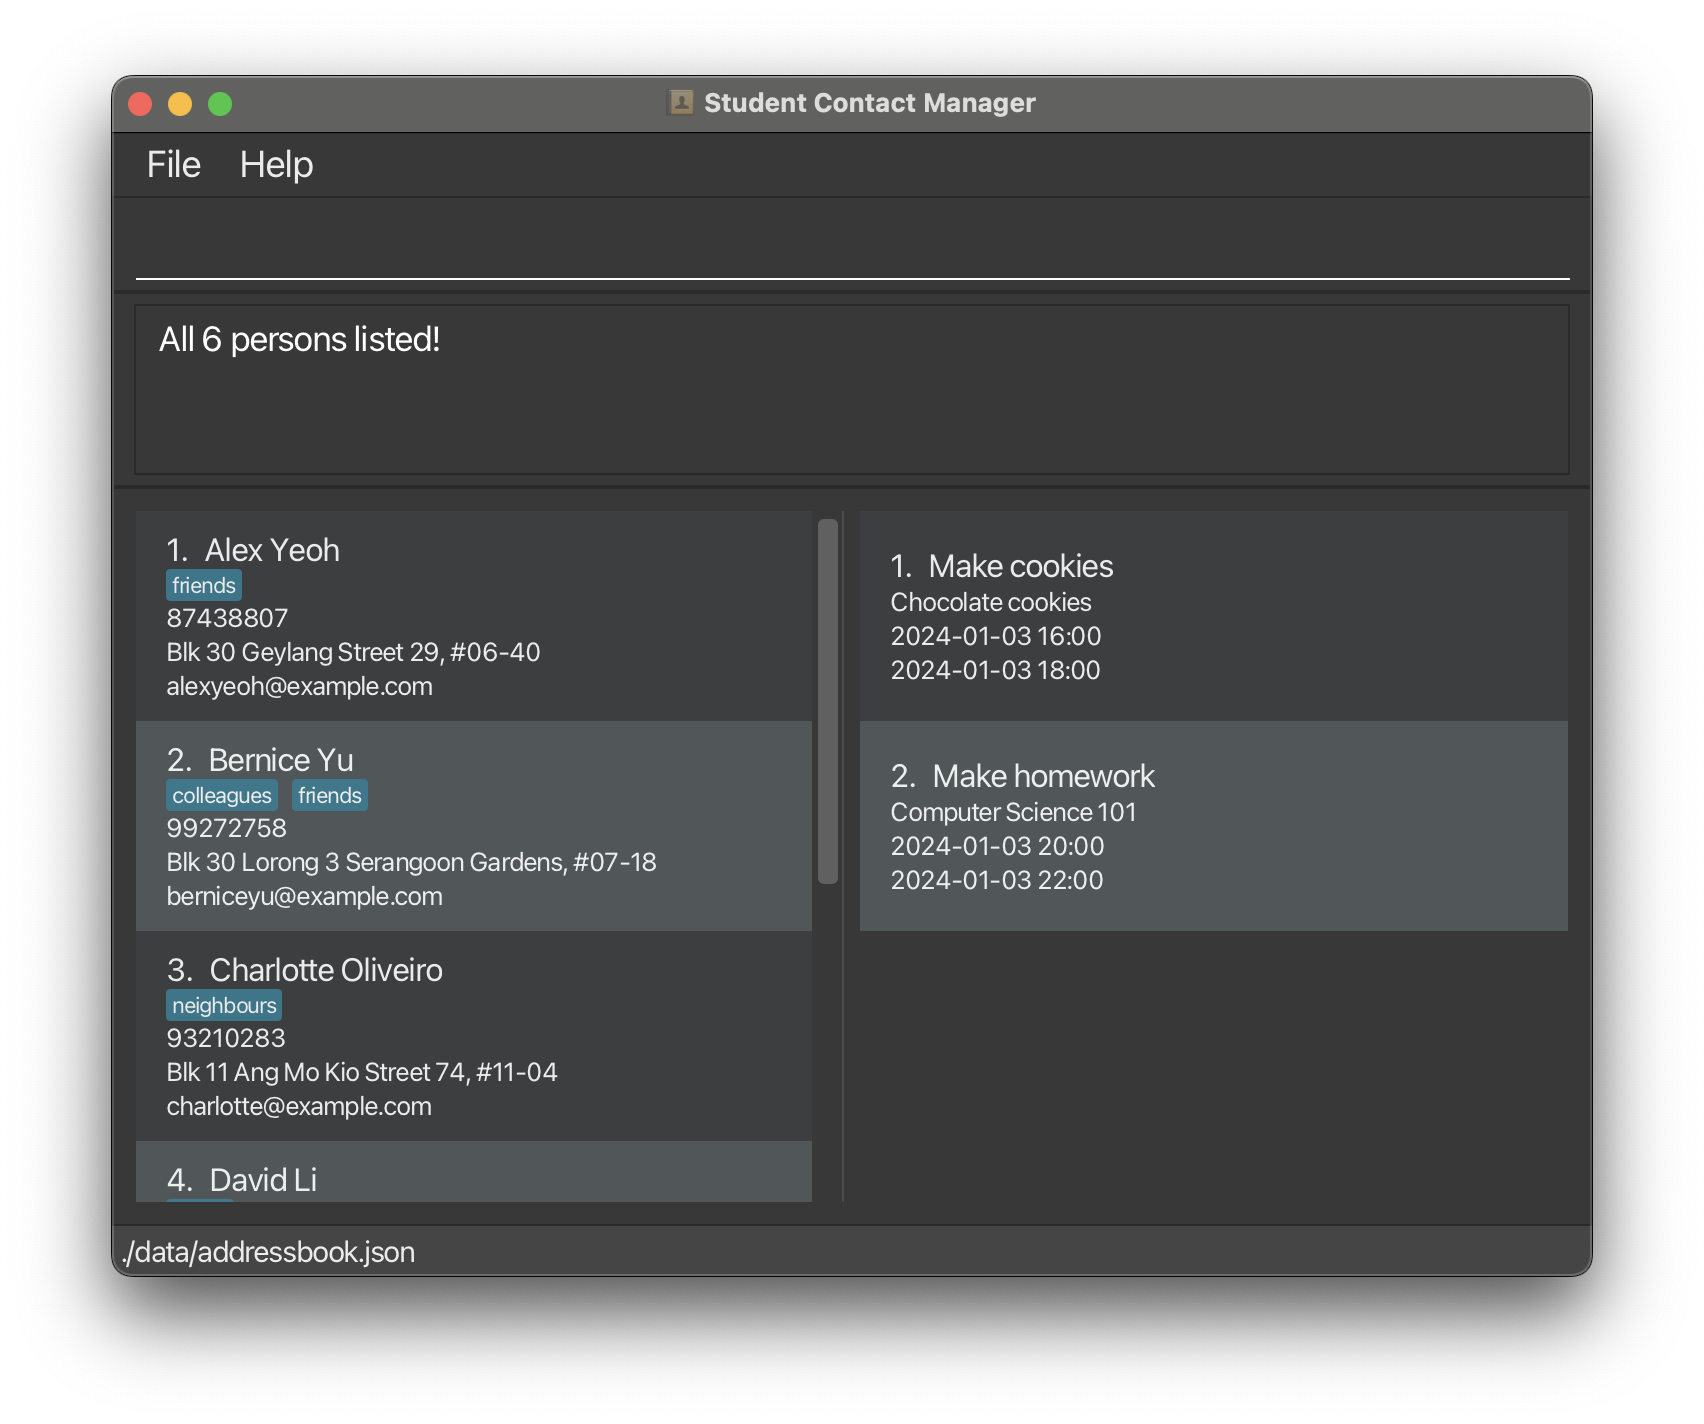
A GUI similar to the below should appear in a few seconds. Note how the app contains some sample data.

Type the command you want to run inside the command box and press
Enterto execute it. As an example, typinghelpand pressingEnterwill open the help window.
There are some example commands you can try:list: Lists all contacts.add n/John Doe p/98765432 e/johnd@example.com a/John street, block 123, #01-01: Adds a contact namedJohn Doeto the Student Contact Manager.delete 3: Deletes the 3rd contact shown in the current list.clear: Deletes all contacts.exit: Exits the app.
Refer to the Features section below for the complete list of commands as of each command.
Features
Notes about the command format and application:
Words in
UPPER_CASEare the parameters to be supplied by the user.
e.g. inadd n/NAME,NAMEis a parameter which can be used asadd n/John Doe.Items in square brackets are optional.
e.gn/NAME [t/TAG]can be used asn/John Doe t/friendor asn/John Doe.- Note: Sometimes, commands require the presence of at least one optional item. This will be made clear in the description of each individual command.
Items with
...after them can be used multiple times, including zero times.
e.g.[t/TAG] ...can be used as(i.e., 0 times),t/friend,t/friend t/family, etc.Parameters can be in any order.
e.g. if the command specifiesn/NAME p/PHONE_NUMBER,p/PHONE_NUMBER n/NAMEis also acceptable.Extraneous parameters for commands that do not take in parameters (such as
help,list,exitandclear) will be ignored.
e.g. if the command specifieshelp 123, it will be interpreted ashelp.If you are using a PDF version of this document, be careful when copying and pasting commands that span multiple lines as space characters surrounding line-breaks may be omitted when copied over to the application.
The application is only able to work properly using ASCII characters (i.e., standard characters found on an English keyboard). The use of other character sets is currently unsupported.
All commands are case-sensitive. As an example, listing contacts requires the
listcommand (with all lowercase characters). Variants such asLISTorListwill not be accepted by the application.
Click here to go back to the top of this user guide.
Viewing help : help
Shows a message explaining how to access the help page. The help page is located at https://ay2324s2-cs2103t-w08-3.github.io/tp/UserGuide.html.
Format: help
Click here to go back to the top of this user guide.
Changing the theme : theme
Changes the theme of the application. Useful if you wish to change the appearance of the application. The application currently supports light and dark themes.
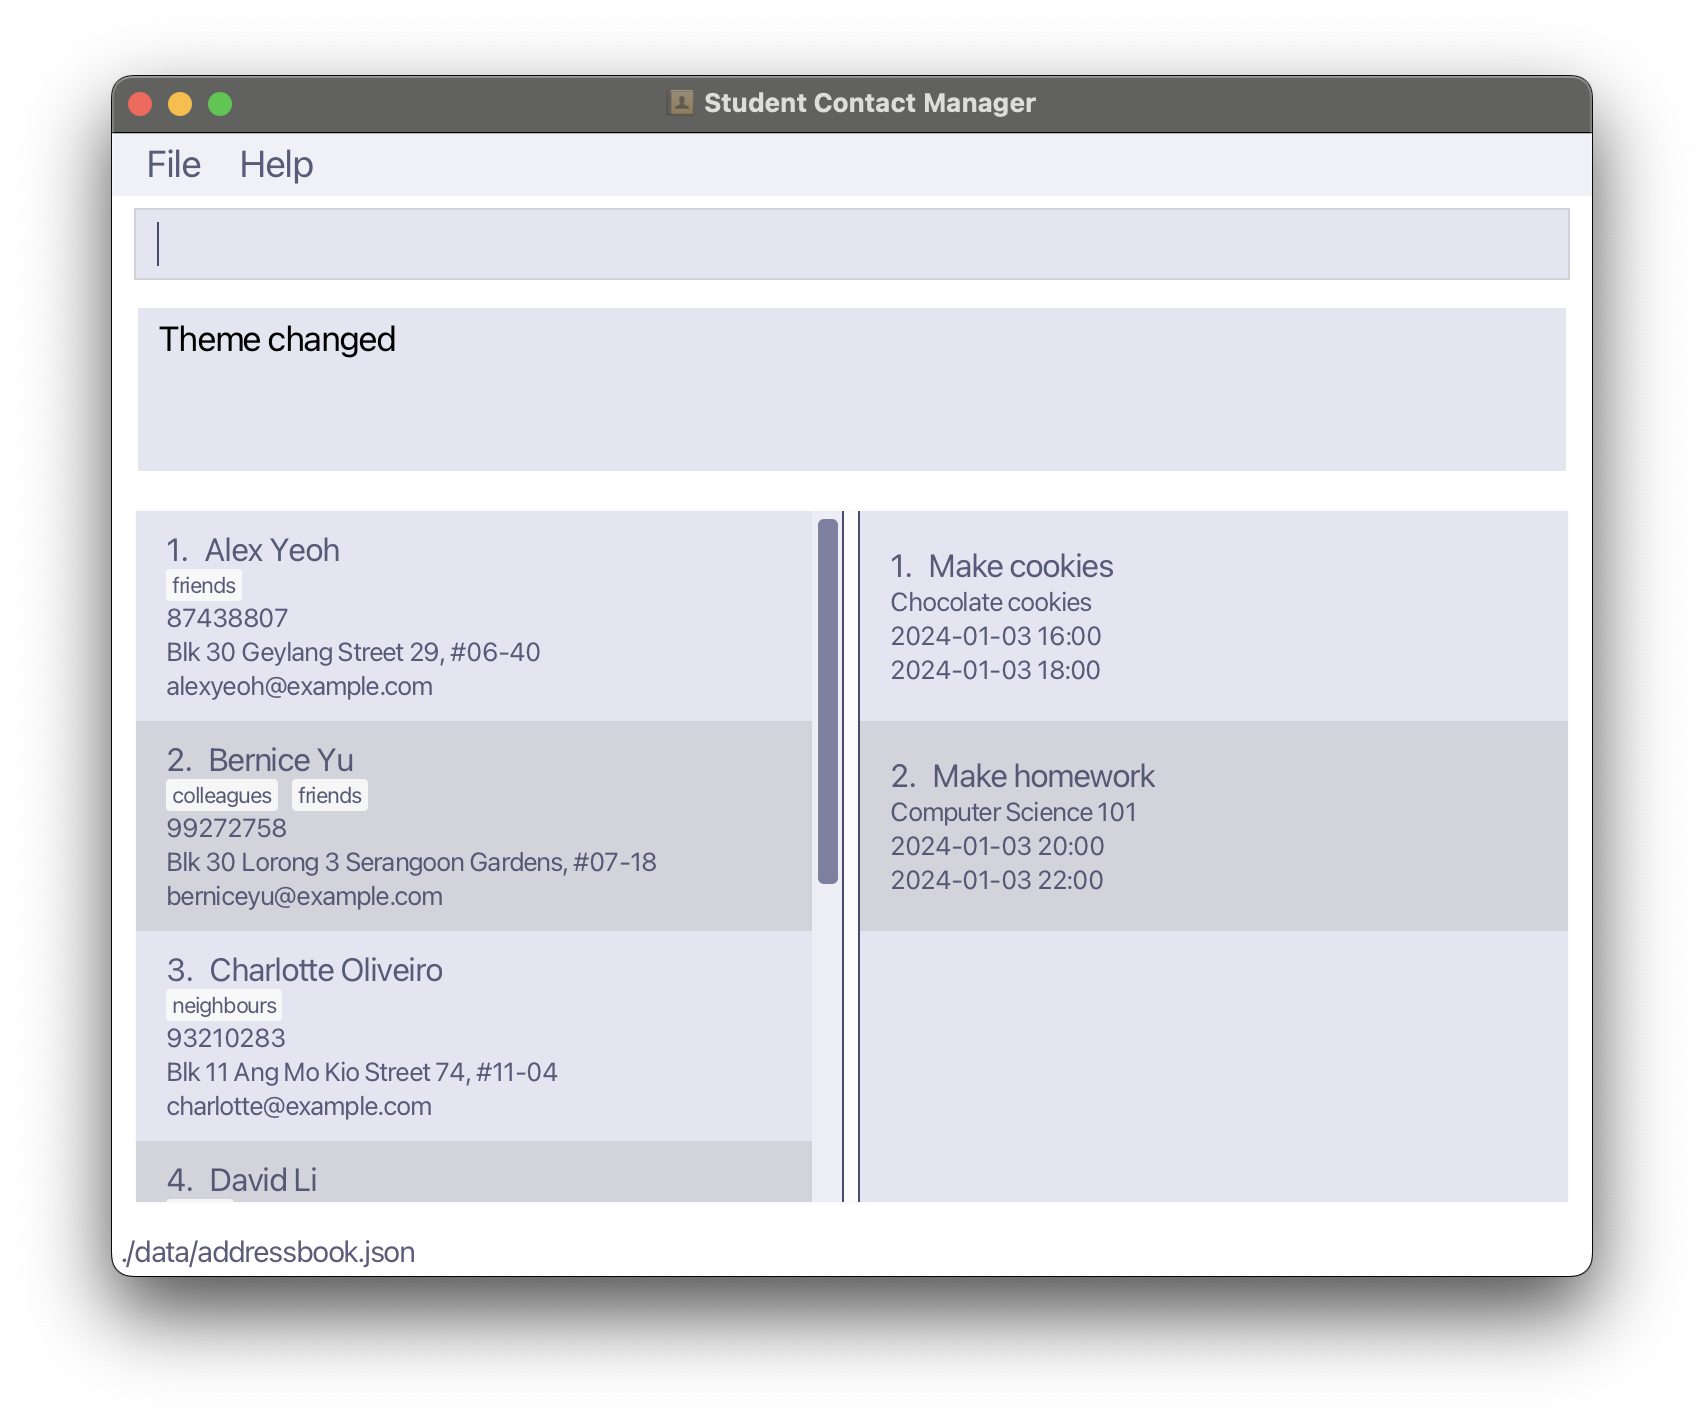
Below is a picture of how the light theme is supposed to look like:
Format: theme THEME_NAME
Examples:
theme lighttheme dark
Click here to go back to the top of this user guide.
Adding a person: add
Adds a person to the Student Contact Manager. Useful if you need to store a person's details for recording purposes. There are various details that must be added, including name, phone number, email, and address. Tags are optional. The name must be alphanumeric (i.e., no punctuations are allowed) and can contain spaces after the first character.
Format: add n/NAME p/PHONE_NUMBER e/EMAIL a/ADDRESS [t/TAG] ...
Tip: A person can have any number of tags (including 0)
Examples:
add n/John Doe p/98765432 e/johnd@example.com a/John street, block 123, #01-01add n/Betsy Crowe t/friend e/betsycrowe@example.com a/Newgate Prison p/1234567 t/criminal
Click here to go back to the top of this user guide.
Listing all persons : list
Shows a list of all persons in the contact manager. Useful if you need to view all contacts that you have recorded.
Format: list
Click here to go back to the top of this user guide.
Editing a person : edit
Edits an existing person in the contact manager. Useful if you need to edit a person's details to be updated, or if you have inputted a wrong field. Existing values will be updated to the input values.
Format: edit INDEX [n/NAME] [p/PHONE] [e/EMAIL] [a/ADDRESS] [t/TAG] ...
- Edits the person at the specified
INDEX, whereINDEXrefers to the index number shown in the displayed person list. INDEXmust be a positive integer, such as 1, 2, 3, ..., found as an index for the displayed person list.- At least one of the optional fields must be provided. This means that either
NAME,PHONE,EMAIL,ADDRESSorTAGneeds to be provided. - When editing tags, the existing tags of the person will be removed i.e., adding of tags is not cumulative.
- You can remove all the person’s tags by typing
t/without specifying any tags after it.
Examples:
edit 1 p/91234567 e/johndoe@example.comEdits the phone number and email address of the 1st person to be91234567andjohndoe@example.comrespectively.edit 2 n/Betsy Crower t/Edits the name of the 2nd person to beBetsy Crowerand clears all existing tags. This is because the new tag list is empty.
Click here to go back to the top of this user guide.
Finding persons by name, address, or tag: find
Finds persons whose names, addresses, or tags contain any of the given keywords. Useful if you need to find a certain contact's details without going through the entire list of contacts.
Format: find [n/NAME] [a/ADDRESS] [t/TAG]
findneeds to have at least one ofn/NAME,a/ADDRESS, ort/TAGto run.- The search is case-insensitive. e.g.,
hanswill matchHans - The order of the keywords does not matter. e.g.
Hans Bowill matchBo Hans - Only full words will be matched e.g.
Hanwill not matchHans - Persons matching at least one keyword will be returned (i.e., it is an
ORsearch).- e.g.
Hans Bowill returnHans Gruber,Bo Yang
- e.g.
- If multiple attributes are given, then all given attributes must be matched for the contact to be returned.
Examples:
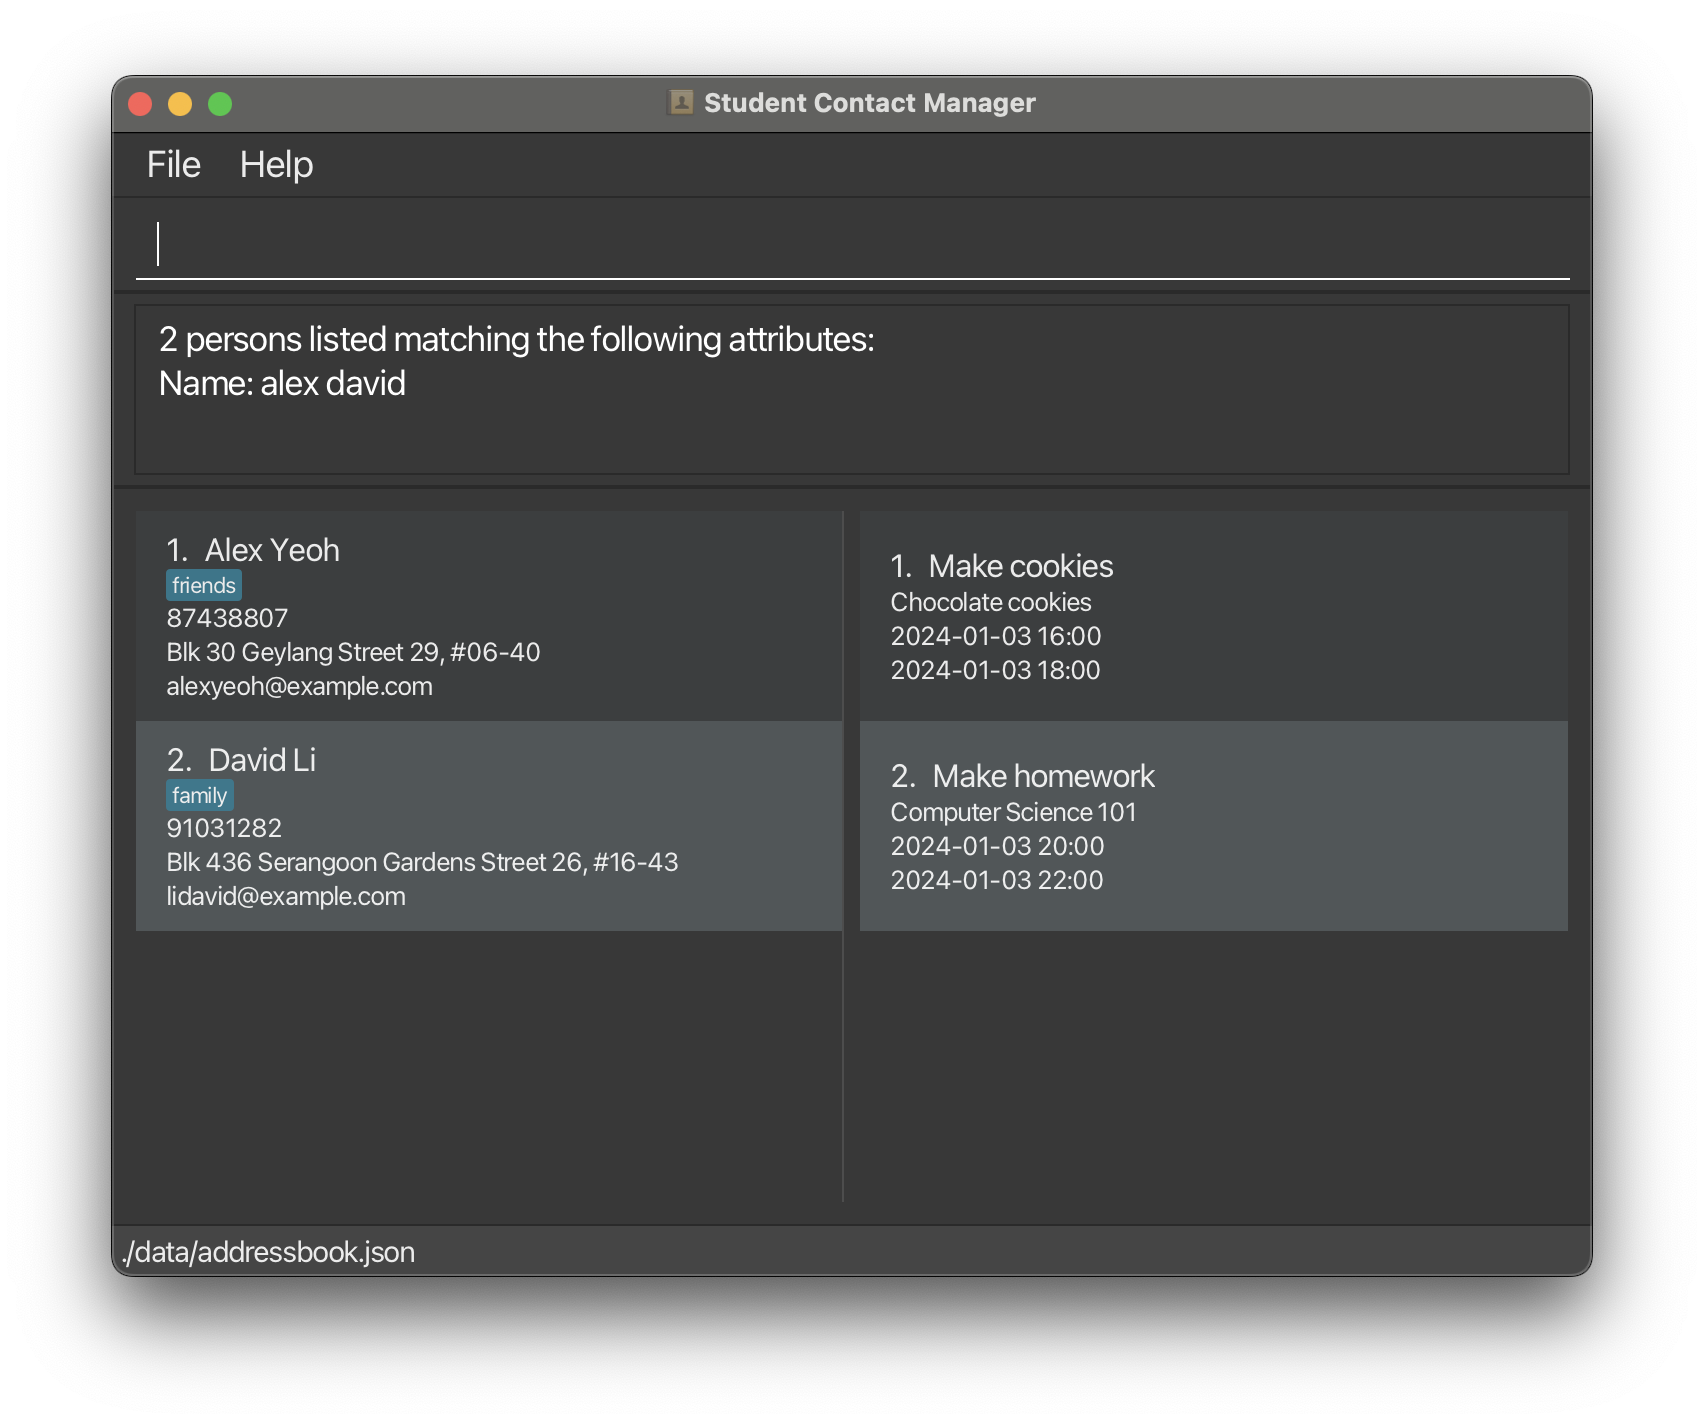
find n/JohnreturnsjohnandJohn Doefind n/alex davidreturnsAlex Yeoh,David Li

find n/alex david t/friendswill only returnAlex Yeoh.find a/Serangoonwill returnBernice YuandDavid Li.
Click here to go back to the top of this user guide.
Exporting a subset of data: find_and_export
Exports the users that are filtered by a tag and other optional parameters. Useful if you want to transfer data regarding groups of people from one device to another. Filenames can only be alphanumeric with either .csv or .json extensions.
Format: find_and_export TAG [n/NAME] [a/ADDRESS] [f/FILENAME]
TAGneeds to be a tag.NAMEneeds to be a substring of a person's name.ADDRESSneeds to be a substring of a person's address.FILENAMEneeds to be a valid filename, and can only have alphanumeric characters.
Examples:
find_and_export cs2103tfind_and_export cs2103t n/john a/olive street 42 f/output1.jsonfind_and_export cs2103t n/john a/olive street 42 f/output1.csv
Tip: FILENAME is optional. If provided, it has to be a valid filename with a .json or .csv extension.
Click here to go back to the top of this user guide.
Importing a datafile: import
Imports contact details from a specified CSV or JSON file. Useful if you have many contacts that you wish to add in one go. Filenames can only be alphanumeric with either .csv or .json extensions.
Format: import f/FILENAME_1 [f/FILENAME_2] [f/FILENAME_3] ...
FILENAME_nneeds to be a valid filename that is found in the./data/directory- Persons that exist in any data file to be imported should not be duplicates of each other or of persons already existing inside the contact manager.
Examples:
import f/export.jsonimport f/contactsExport.csvimport f/contactsExport1.json f/contacts_export2.csv
Click here to go back to the top of this user guide.
Deleting a person : delete
Deletes the specified person from the contact manager. Useful if you wish to remove contacts that you no longer need.
Format: delete INDEX
- Deletes the person at the specified
INDEX. - The index refers to the index number shown in the displayed person list.
- The index must be a positive integer (e.g., 1, 2, 3, ...)
- The index must be not greater than the number of persons in the contact manager.
Examples:
listfollowed bydelete 2deletes the 2nd person in the contact manager.find n/Betsyfollowed bydelete 1deletes the 1st person in the results of thefindcommand.
Click here to go back to the top of this user guide.
Clearing all entries : clear
Clears all contact entries from the contact manager. Useful to clean up contacts if all of them are no longer needed.
Format: clear
Click here to go back to the top of this user guide.
Adding an event : add_schedule
Adds the schedule to the end of the list. Useful for recording details about events that occur. The schedule title and description must be alphanumeric and can contain spaces after the first character.
Format: add_schedule title/TITLE d/DESCRIPTION start/START_DATETIME end/END_DATETIME
- Both
TITLEandDESCRIPTIONcan contain alphanumeric characters, spaces, and punctuations. - Both
START_DATETIMEandEND_DATETIMEneed to be inYYYY-MM-DD HH:mmformat.YYYYrefers to the year (in 4-digit format).MMrefers to the month (in 2-digit format). As an example, March would be translated to03.DDrefers to the date (in 2-digit format).HHrefers to the hour (in 24-hour and 2-digit format).mmrefers to the minute (in 2-digit format).- As an example, 4PM on March 5th, 2024 would be entered in as
2024-03-05 16:00.
Examples:
add_schedule title/Meeting d/CS2103T start/2024-04-13 21:00 end/2024-04-13 22:00add_schedule title/Internship Interview @Google d/Google Interview start/2024-04-13 14:00 end/2024-04-13 15:00
Click here to go back to the top of this user guide.
Editing an event : edit_schedule
Edits an existing schedule in the schedule list. Useful if you wish to edit a certain schedule's description or timings.
Format: edit_schedule INDEX [title/TITLE] [d/DESCRIPTION] [start/START_DATETIME] [end/END_DATETIME]
- Edits the schedule at the specified
INDEX, whereINDEXrefers to the index number shown in the displayed schedule list. INDEXhas to be a positive integer that is found as an index for the schedule.- At least one of
TITLE,DESCRIPTION,START_DATETIMEorEND_DATETIMEhas to be provided for the command to run. TITLEandDESCRIPTIONmust be alphanumeric.START_DATETIMEandEND_DATETIMEmust be inYYYY-MM-DD HH:mmformat and must be valid datetimes.
Examples:
edit_schedule 1 title/Project meetingEdits the title of the 1st schedule to beProject meeting.edit_schedule 2 d/Project meeting start/2024-04-13 21:00 end/2024-04-13 22:00Edits the description, start datetime, and end datetime of the 2nd schedule.
Click here to go back to the top of this user guide.
Listing all events : list_schedule
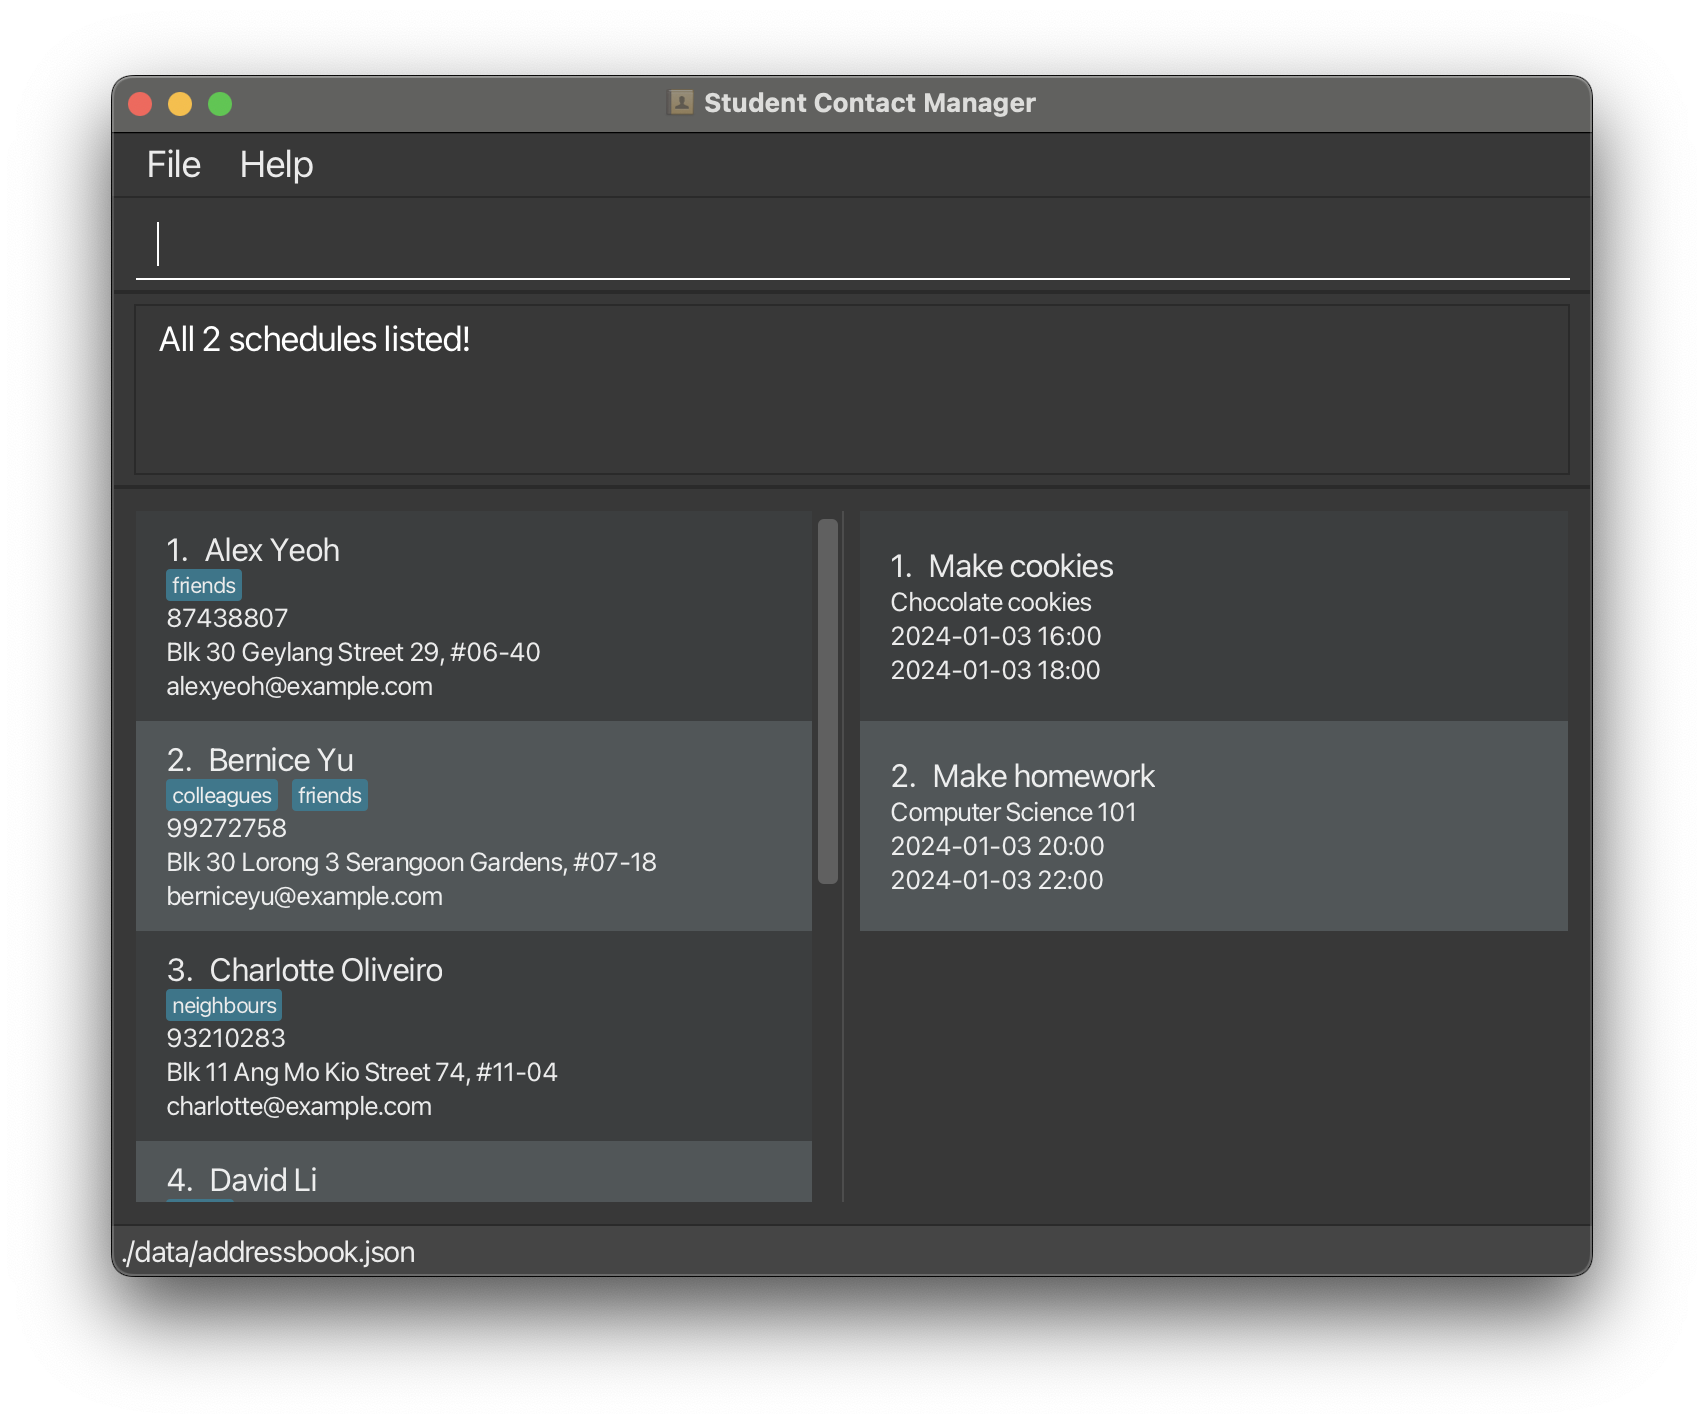
Lists all the events currently available. Useful if you wish to view all the events that are in the database.
Format: list_schedule
Click here to go back to the top of this user guide.
Listing ongoing events : list_ongoing_schedule
Lists all the events that are currently ongoing. Useful if you wish to view all the events that are currently ongoing.
Format: list_ongoing_schedule
Click here to go back to the top of this user guide.
Finding events by certain attributes: find_schedule
Finds all events that match the given attributes. Useful if you wish to find events that match certain criteria.
Format: find_schedule [title/TITLE] [d/DESCRIPTION] [before/BEFORE_DATETIME] [after/AFTER_DATETIME] [during/DURING_DATETIME]
find_scheduleneeds to have at least one ofTITLE,DESCRIPTION,BEFORE_DATETIME,AFTER_DATETIMEorDURING_DATETIMEto run.- For
TITLEandDESCRIPTION:- The search is case-insensitive. e.g.,
Meetingwill matchmeeting. - The order of the keywords does not matter. e.g.
Meeting Projectwill matchProject Meeting. - Only full words will be matched e.g.
Meetwill not matchMeeting - Schedules matching at least one keyword will be matched for that attribute (i.e., it is an
ORsearch).- e.g.
Meeting Projectwill be matched byZoom Meeting,Coding Project.
- e.g.
- The search is case-insensitive. e.g.,
- For
BEFORE_DATETIME,AFTER_DATETIMEandDURING_DATETIME:- The datetime must be a valid datetime in
YYYY-MM-DD HH:mmformat. - Schedules matching all given datetime attributes will be returned (i.e., it is an
ANDsearch).- e.g.
before/2021-10-10 12:00 after/2021-10-10 10:00will return schedules that are between10:00and12:00on2021-10-10.
- e.g.
- The
BEFORE_DATETIMEattribute is matched if the schedule ends on or before the given datetime. - The
AFTER_DATETIMEattribute is matched if the schedule starts on or after the given datetime. - The
DURING_DATETIMEattribute is matched if the given datetime is between the start datetime and end datetime of the schedule, inclusive.
- The datetime must be a valid datetime in
- If multiple attributes are given, then all given attributes must be matched for the event to be returned.
Examples:
find_schedule title/Meetingreturns all schedules with the titleMeeting.find_schedule before/2024-04-13 21:00 after/2024-04-13 20:00returns all schedules that are between20:00and21:00on2024-04-13.
Click here to go back to the top of this user guide.
Deleting an event : delete_schedule
Deletes the event at the given index. Useful if you wish to delete an event that is no longer needed.
Format: delete_schedule INDEX
INDEXmust be a positive integer and not greater than the number of schedules in the displayed schedule list.
Click here to go back to the top of this user guide.
Clearing all events : clear_schedule
Clears all events from the schedule list. Useful if you wish to clear all events that are no longer needed.
Format: clear_schedule
Click here to go back to the top of this user guide.
Calendar view of schedule : calendar_view
Shows your schedule for the month in a pop-up window. Useful to see an overall view of schedules in the month.
Format: calendar_view
Click here to go back to the top of this user guide.
Exiting the program : exit
Exits the program.
Format: exit
Click here to go back to the top of this user guide.
Saving the data
Student Contact Manager data are saved in the hard disk automatically after any command that changes the data. There is no need to save manually.
Click here to go back to the top of this user guide.
Editing the data file
Student Contact Manager data are saved automatically as a JSON file [JAR file location]/data/addressbook.json. Advanced users are welcome to update data directly by editing that data file.
Caution:
If your changes to the data file makes its format invalid, Student Contact Manager will discard all data and start with an empty data file at the next run. Hence, it is recommended to take a backup of the file before editing it.
Furthermore, certain edits can cause Student Contact Manager to behave in unexpected ways (e.g., if a value entered is outside the acceptable range). Therefore, edit the data file only if you are confident that you can update it correctly.
Click here to go back to the top of this user guide.
FAQ
Q: How do I transfer my data to another computer?
A: Install the app in the other computer and overwrite the empty data file it creates with the file that contains the data of your previous Student Contact Manager home folder.
Click here to go back to the top of this user guide.
Known issues
- When using multiple screens, if you move the application to a secondary screen, and later switch to using only the primary screen, the GUI will open off-screen. The remedy is to delete the
preferences.jsonfile created by the application before running the application again.
Click here to go back to the top of this user guide.
Command summary
| Action | Format, Examples |
|---|---|
| Add Person | add n/NAME p/PHONE_NUMBER e/EMAIL a/ADDRESS [t/TAG]... e.g., add n/James Ho p/22224444 e/jamesho@example.com a/123, Clementi Rd, 1234665 t/friend t/colleague |
| Clear Persons | clear |
| Delete Person | delete INDEXe.g., delete 3 |
| Edit Person | edit INDEX [n/NAME] [p/PHONE_NUMBER] [e/EMAIL] [a/ADDRESS] [t/TAG] ...e.g., edit 2 n/James Lee e/jameslee@example.com |
| Find Persons | find [n/NAME] [a/ADDRESS] [t/TAG] e.g., find n/James Jake |
| List Persons | list |
| Help | help |
| Theme | theme e.g., theme light |
| Find and Export to File | find_and_export TAG [n/NAME] [a/ADDRESS] [f/FILENAME] e.g., find_and_export friends |
| Import from File | import f/FILENAME_1 [f/FILENAME_2] [f/FILENAME_3] ... e.g., import f/export_file.json |
| Add Schedule | add_schedule title/TITLE d/DESCRIPTION start/START_DATETIME end/END_DATETIME e.g., add_schedule title/Meeting d/Project Meeting start/2024-03-10 16:00 end/2024-03-10 18:00 |
| Clear Schedules | clear_schedule |
| Delete Schedule | delete_schedule INDEX e.g., delete_schedule 1 |
| Edit Schedule | edit_schedule INDEX [title/TITLE] [d/DESCRIPTION] [start/START_DATETIME] [end/END_DATETIME] e.g., edit_schedule 1 title/Project meeting |
| Find Schedules | find_schedule [title/TITLE] [d/DESCRIPTION] [before/BEFORE_DATETIME] [after/AFTER_DATETIME] [during/DURING_DATETIME] e.g., find_schedule title/Meeting |
| List Schedules | list_schedule |
| List Ongoing Schedule | list_ongoing_schedule |
| Calendar View | calendar_view |
Click here to go back to the top of this user guide.


